Tile Installation
Tile Installation
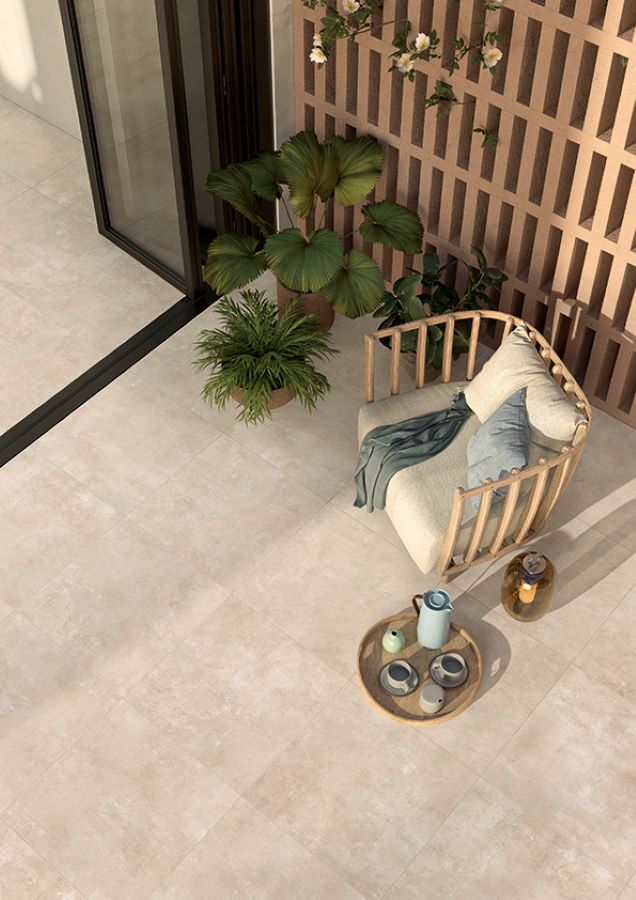
Porcelain and ceramics are brilliant materials. They are hardwearing, easy to maintain and in stunning designs. You want your tiled walls and floors to stand the test of time and look amazing in years to come and correct, professional tile installation is the key. This is about using the correct installation products, ensuring the substrates you are adhering to are suitable and prepared correctly and your tiles are correctly cleaned after initial tile installation.
You will find useful and helpful information on our installation page, however, because every project is different we strongly recommend referring to the British Standard BS5285 Parts 1-5 for wall and floor tiling. This is the code of practice for the design and installation of ceramic tiles, mosaics and natural stone.
The information contained below is by no means exhaustive so if something is not covered here and you require more information please get in touch. We always recommend using a professional installer for your project with the necessary experience and checking with your installer the suitability of your chosen tiles for your project before purchasing.
For more detailed tile installation information The Tile Association (tiles.org.uk) Tiling Guide provides useful information.
We also work closely with Mapei and Bal whose technical specification departments can provide installation specification documents for your specific project. Scroll down to view some generic specifications for installation of tiles.
In addition below you will find:
Our tile guides for general information.
Our Helpful Information page which gives you some quick tips and information.
Helpful Information
10mm Outside Porcelains
10mm outside porcelains must be laid on a concrete bed that is fully cured and with a suitable and good quality cement based adhesive and it is critical to ensure tiles are fully supported. It is also important you use a professional installer for your project with the necessary experience.
Click here to read a generic specification from Mapei regards installation of 9mm/10mm outside porcelains onto a fully cured concrete bed. Note, this specification is generic. If you require a specification specifically for your project please get in touch with us to arrange that.
We strongly recommend referring to the relevant British Standard BS5385 Parts 1-5 which is the code of practice for the design and installation of ceramic tiles, mosaics and natural stone. It is also important you use a professional installer for your project with the necessary experience.
If you would like more information on installation or have any questions please get in touch. We an also arrange a specification via the Mapei or BAL technical teams for your project.
20mm Outside Porcelains
20mm outside porcelains should also ideally be laid on a concrete bed that is fully cured and with a suitable and good quality cement based adhesive and it is critical to ensure tiles are fully supported. However, there are other options for installation of 20mm outside porcelains if you do not have a concrete bed.
Click here to read a generic specification from Mapei regards installation of 20mm onto a Type 1 MOT sub-base as well as onto a fully cured concrete bed. Note, this is a generic specification. If you require a specification for your specific project please get in touch with us.
We strongly recommend referring to the relevant British Standard BS5385 Parts 1-5 which is the code of practice for the design and installation of ceramic tiles, mosaics and natural stone. It is also important you use a professional installer for your project with the necessary experience.
If you would like more information on installation or have any questions please get in touch. We can also arrange a specification via the Mapei or BAL technical teams for your project.
Porcelain, Ceramic and Large Format Porcelain Tile Recommendations
You want your tiled floor and walls to stand the test of time and look amazing for years to come. Porcelain and ceramic, as materials, are beautiful, hardwearing and easy to work with, however correct preparation of the substrate prior to fixing is key to preventing problems in the future.
Whether you are fixing to a wall or floor any substrate you are fixing to must be correctly prepared. They should be clean, flat, level and free from movement and anything underlying that could cause future issues. Identifying the substrate correctly is vital to ensure correct advice and fixing materials are provided. This is especially so in the case of larger formats and porcelains that tend to be heavier than ceramics. It is critical the substrate has the suitable weight bearing capability to accommodate your chosen tiles.
For guidance on weight bearing capabilities of various substrates we recommend referring to the relevant British Standard BS5385 which is the British Standard for wall and floor tiling. We've detailed below some considerations but please understand that tile installation requirements may vary depending on the tiles you choose, the fixing products used and the conditions.
So always check with your installer regards the suitability of your chosen tiles for your project and take advice on the correct adhesive products for your tiles and the surface to which they are being fixed. If you need any advice, please contact us, we'd be delighted to help.
Tiles should be handled with gloves and special care taken to prevent dropping or breaking tiles, this is particularly important with rectified tiles so ensure tiles are not knocked against one another to prevent damaging edges.
Large format tiles are heavy and should be handled by at least 2 people and suction pads used to remove them from packaging. Carry the tiles vertically to avoid buckling in the centre. As with all tiles, never rest them directly on the floor or against a wall. Rest them on cork supports or similar material that will be able to withstand the weight of the tiles.
Always cut or drill tiles in well ventilated conditions and wear appropriate safety masks and goggles. It’s important the correct tools are used to cut your tiles. Wet cutting is recommended.
Before laying tiles, test what they will look like on an area of at least 9sqm. Most good quality tiles will have shade variation from tile to tile to make them as realistic as possible so take tiles from several boxes to check the overall effect. This is different to tiles differing batch to batch. It is important that all your tiles are from the same batch and that means ordering all your tiles in one go and allowing enough waste.
Before installation, check the substrate has been prepared and built in compliance with the intended use and has been correctly prepared for the use of adhesive. For walls ensure the substrate you are adhering to has a suitable weight bearing capability – refer to British Standards BS5385 for more information and note that BS5285 states plywood and other wood based sheets or boards should not be used for direct tiling to walls. You will find pack sizes and weights on our website, however, if you have specific questions, please do get in touch with us.
For floors it is important that the floor is rigid and won’t flex as movement could crack larger tiles. If you are unsure please contact us for further advice.
It is important that substrates are completely level and flat and totally clean to ensure a firm bond. Ensure the back of tiles are free of dust or debris prior to installation. It is essential to use the correct adhesives – for example C1 cement-based adhesives for porous white body/ceramic indoor wall tiles and C2 for indoor and outdoor porcelain wall and floor tiles. Always ensure as near as possible 100% coverage of the tile adhesive. Install large formats with the floating and buttering method. Ensure the bonding material is evenly spread across the whole surface. To ensure full contact between tile and adhesive tap the surface or press it down with a white rubber mallet.
For tiles with a length of 600mm or more, which is large format tiles, a 50:50 brick bond pattern is not recommended. Instead the maximum offset should be 33%.
Tiles from our Haven, Fuse, Louis, Dwell, Season and Bliss collections have a special was coating to protect them when they are being handled and laid. The wax coating can easily be removed with a damp cloth. If you have difficulties please contact us.
For grouting, larger format tiles where no side is greater than 1200mm in length and with an area of 0.1sqm to 1sqm should have at least a 3mm grout width. The grout width needs to be increased relative to the size of the panel for example a 3m panel will require a joint width of 5mm. Refer to British Standards for further information.
Suitable grout must be used and is based on the type of tile and the location being tiled and of course colour. Check with your tiler or contact us if you are unsure. For more information on installing large format tiles externally please contact us.
It is recommended to wash the surface of tiles with an acid detergent suitable for porcelain stoneware within 36-48 hours of installation – for more information and tips on ongoing maintenance visit our Care + Maintenance page. It is essential the initial clean is carried out correctly to minimise ongoing maintenance. Day to day, porcelain and ceramics should only really need a mop/cloth and warm water.
Super-Size Porcelain Slab 2780 x 1200mm Recommendations
Our super-size slabs are beautiful, hardwearing and easy to work with. However, they do require some specialist handling to ensure they are installed correctly. We strongly recommend referring to the relevant British Standard BS5385 which is the British Standard for wall and floor tiling and using a professional installer for your project.
Always check with a professional fitter regards the suitability of slabs for your project. Installation requirements may vary depending on the tiles you choose, the fixing products used and the conditions.
It is possible to install these slabs on floors. We have recommended them for wall tile installation only. If are considering installing on a floor then please contact us for more detail.
It is strongly recommended at least 4 qualified operators are required when removing slabs from the delivery crate and to the work site. Local manual handling guidelines should be adhered to. A wheeled trolley may be necessary to move slabs. Take care to move carefully and avoid bending slabs to prevent breakage.
Always cut or drill tiles in well ventilated conditions and wear appropriate safety masks and goggles. For more specific information on cutting and drilling large format slabs please contact us. Wet cutting is recommended.
Before tile installation, check the substrate has been prepared and built in compliance with the intended use and has been correctly prepared for the use of adhesive.
For walls ensure the substrate you are adhering to has a suitable weight bearing capability – refer to British Standards BS5385 for more information and note that BS5285 states plywood and other wood based sheets or boards should not be used for direct tiling to walls. You will find pack sizes and weights on our website, however, if you have specific questions, please do get in touch with us.
Clean the surface of tiles to remove residues. It is imperative the correct adhesives are used (use category C2E or superior with limited vertical slippage for walls). Adhesive must be applied with the double spreading technique to ensure correct distribution of adhesive and avoid air gaps that can lead to breakage. Adhesive must be spread full-bed on the supporting surface using a notched trowel (10mm gap between notches).
Ensure stripes of the last layer of adhesive have a single direction, parallel to the short side of the slab. The application of adhesive on the rear side of the slab must be performed using a notch with 3mm notches. Slabs must be secured in an upright position to the handling frame.
As tiles are pressed into the adhesive bed use a slight twisting action to achieve sufficient contact. After installation it is recommended to tap the surface with a special mallet starting from the centre and out to the sides to eliminate air pockets.
Grout joints should be in accordance with British Standards. For grouting, larger format tiles where no side is greater than 1200mm in length and with an area of 0.1sqm to 1sqm should have at least a 3mm grout width. The grout width needs to be increased relative to the size of the panel for example a 3m panel will require a joint width of 5mm. Refer to British Standards for further information and note the grain size of grout must be suitable for the width of the joint.
Our super-size slabs have a special surface so avoid harsh cleaning products. A damp cloth and neutral ph product is recommended. A cement-based grout (not epoxy) should be used and straight after grouting ensure any residue is removed with water and a soft cloth.
Lorem ipsum dolor sit amet, consectetur adipiscing elit. Ut elit tellus, luctus nec ullamcorper mattis, pulvinar dapibus leo.